Roof Leak Repair & Prevention (6 Step Guide for Homeowners)
Posted 6.17.25 | 9 Minute Read
A leaking roof can quickly turn from a minor inconvenience into a major headache for homeowners. Water damage spreads fast, affecting your ceiling, walls, flooring, and personal belongings. The good news? Most roof leaks can be repaired effectively when you know what to look for and how to respond quickly.
This comprehensive guide will walk you through everything you need to know about roof leak repair, from identifying the warning signs to preventing future problems. Whether you’re dealing with a small drip or a more serious leak, we’ll help you understand your options and make informed decisions about protecting your home.
Here’s what we’ll cover:
- Understanding common causes of roof leaks
- 6 step roof leak repair process
- Prevention strategies to avoid future leaks
💡 Understanding Common Causes of Roof Leaks

Before you can effectively repair a roof leak, you need to understand what typically causes them. Identifying the root cause helps ensure your repair will last and prevents the same problem from happening again. Severe storms are one of the biggest culprits—especially in areas like Charlotte, NC, where seasonal hurricanes and hail can severely damage shingles and flashing.
Weather-Related Damage
- Severe weather, such as heavy rain, snow, ice, and strong winds, can compromise your roof’s integrity.
- Ice dams form when snow melts and refreezes at the roof’s edge, forcing water under shingles.
- Wind can lift or tear shingles, exposing the underlayment beneath.
- Hail damage can crack or puncture roofing materials, creating entry points for water.
- Even small hailstones can cause granule loss on asphalt shingles, reducing their effectiveness over time.
Aging and Wear
- Roofing materials naturally deteriorate over time.
- Asphalt shingles typically last 20-30 years, while other materials have different lifespans.
- Aging can cause shingles to crack, curl, or become brittle.
- Adhesive strips that hold shingles in place may fail, allowing shingles to lift in moderate winds.
- Flashing around chimneys, vents, and other roof penetrations is especially vulnerable to age-related wear and can crack or pull away from surfaces over time.
✅ 6 Step Roof Leak Repair Process

Repairing a roof leak requires careful attention to safety and proper technique. Follow these steps to address common leak problems effectively.
1. Safety First – Prepare Your Work Area
Roof repairs can be dangerous, so it’s essential to prioritize safety at all times. Never attempt to fix a roof in wet, windy, or icy conditions, as slick surfaces and unstable footing can lead to serious accidents. Always wait for clear, dry weather before starting any work. Equip yourself with the proper safety gear, including non-slip shoes to prevent slipping, heavy-duty gloves to protect your hands, and safety glasses to shield your eyes from debris.
When setting up your ladder, make sure it is on firm, level ground, and place it away from any power lines or hazards. Ensure the ladder is secure and stable before climbing, and always have a second person spotting you for added stability and support. Maintain three points of contact on the ladder at all times (two hands and one foot or two feet and one hand). If your roof is steep or particularly high, consider using a safety harness attached to an anchor point for extra protection. Safety should always come first, so don’t rush the preparation process.
2. Locate the Source of the Leak
Finding the source of a roof leak is not always straightforward. Water can travel along beams, rafters, and other surfaces before finally dripping into your living space. To locate the source, start by carefully examining the area inside your house where water is appearing. Look for signs such as water stains, discoloration on walls or ceilings, mold growth, or dampness that might give clues to the leak’s origin.
Next, go into the attic and trace the water’s path upward and outward from where you see the leak inside. Use a flashlight to inspect the attic thoroughly, as water may travel along rafters, roof decking, or insulation before pooling or dripping. Look for shiny, wet spots or stains that can indicate where water has been entering. Be thorough in your inspection, as the actual entry point on the roof may be farther away from where the water is visible inside your home.
3. Inspect the Roof Surface
Once you’ve identified the general area of the leak from inside, move to the roof to inspect the surface above that area. Before climbing onto the roof, double-check your ladder setup and wear your safety gear. Look for missing, cracked, or curled shingles, as these are common culprits for water infiltration. Inspect the flashing around roof penetrations, such as chimneys, vents, and skylights, for gaps, rust, or damage that might allow water to seep through.
Pay special attention to roof valleys, where two roof planes meet, as these areas are particularly vulnerable to leaks. Examine the condition of the caulking or sealant around roof penetrations, and look for signs of wear, cracking, or peeling. Additionally, check for any visible holes, punctures, or other damage to the roof surface that could be contributing to the leak. Even small imperfections can allow water to enter, so be diligent in your inspection. You can refer to our detailed guide on what hail damage looks like on a roof to help identify damage that might not be visible at first glance.
4. Make Temporary Repairs
If you locate the damaged area but cannot perform a permanent repair immediately, you can make a temporary fix to prevent further water damage until more extensive repairs can be done. For small holes or cracks, apply roofing cement generously over the damaged area using a putty knife. Spread it several inches beyond the edges of the damage to create a strong, watertight seal. If you have a spare shingle, embed it into the roofing cement for added durability.
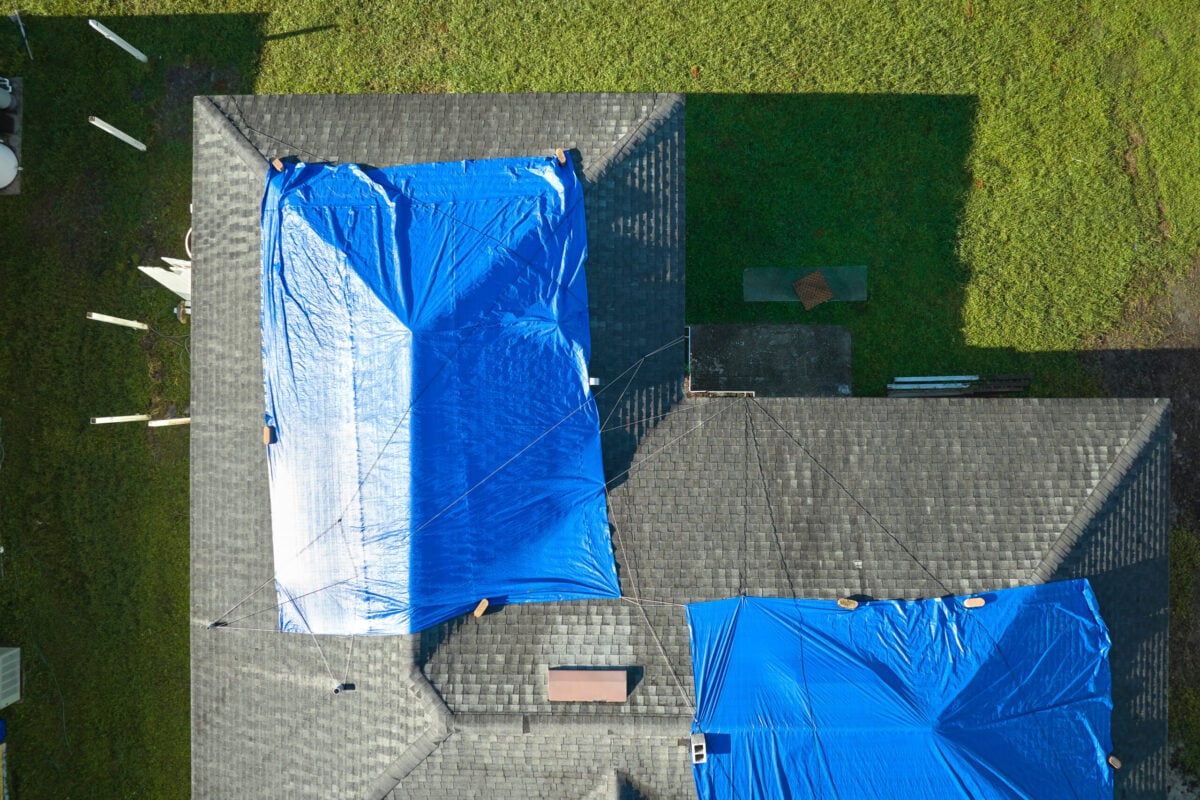
For larger damaged sections, cover the area with a waterproof tarp. Secure the tarp tightly with roofing nails or heavy-duty staples, ensuring it extends well beyond the damaged area on all sides. Position the tarp so it overlaps the surrounding shingles to direct water away from the repair. Make sure the tarp is taut and properly secured to prevent wind from lifting it. While this is only a temporary solution, it can protect your home until a permanent fix is possible. Homeowners in Rock Hill, SC often use this method after storms to prevent additional moisture intrusion until professional help arrives.
5. Replace Damaged Shingles
If you find that shingles are cracked, broken, or missing, they will need to be replaced to restore the integrity of your roof. Start by carefully lifting the shingle above the damaged one to access the nails holding it in place. Use a pry bar or hammer to remove the nails, and gently slide the damaged shingle out. If the shingle is stuck, you may need to loosen it with a putty knife.
Slide the new shingle into position, ensuring it aligns properly with the surrounding shingles to maintain a uniform appearance. Secure the new shingle with roofing nails placed just below the adhesive strip, and make sure the nails are flush with the surface but not overdriven. Apply a small amount of roofing cement under the edges of the surrounding shingles and press them down firmly to create a strong, watertight seal. Take your time to ensure the replacement shingle blends seamlessly with the rest of the roof. Before choosing a replacement, explore our breakdown of the best roof shingles to ensure you’re using durable materials that match your roof’s design and climate conditions.
6. Test Your Repair
After completing your repair, it’s important to test it to ensure it’s effective before the next rainstorm. Using a garden hose, gently spray water over the repaired area, starting with light pressure and gradually increasing it. Have someone inside the house or attic monitor the area for any signs of leaks or water intrusion.
Move the hose around the repaired section, simulating rainfall, and take your time to check for any weak points or missed spots. If no water leaks through, your repair is likely successful. However, if you notice water still entering, reassess the area and make additional adjustments as needed. Testing your work ensures peace of mind and prevents further water damage to your home.
👉 Prevention Strategies to Avoid Future Leaks

The best roof leak repair is the one you never have to make. Regular maintenance and proactive care can prevent many common causes of roof leaks and extend your roof’s lifespan significantly.
Regular Inspections
Inspect your roof at least twice a year, preferably in spring and fall. Look for loose, damaged, or missing shingles, and check that flashing around chimneys and vents is secure. Use binoculars to inspect your roof from the ground if you’re not comfortable climbing up.
Pay attention to your gutters and downspouts, as clogs can cause water to back up under shingles. Clean gutters regularly and ensure they’re properly attached to your house.
Maintaining Proper Ventilation
Good attic ventilation prevents moisture buildup that can lead to rot and other structural problems. Ensure your attic has adequate intake vents under the eaves and exhaust vents near the ridge.
Keep attic vents clear of insulation and debris. Poor ventilation can also cause ice dams in winter, which force water under shingles and into your home.
Tree and Debris Management
Trim tree branches that hang over your roof, as they can scrape against shingles and create weak spots. Falling branches can also cause significant damage during storms.
Keep your roof clear of debris like leaves, pine needles, and branches. This debris can trap moisture against your roof and accelerate deterioration.
🛠️ Roof Leak Repair Guide
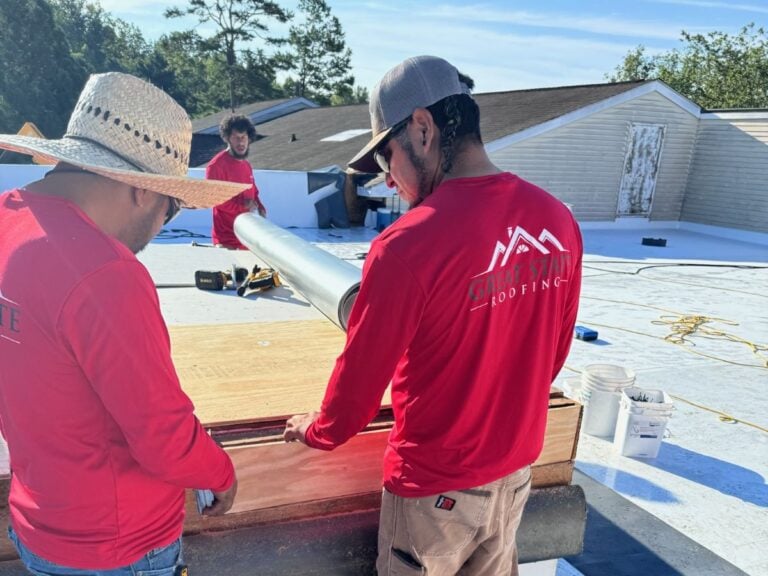
At Great State Roofing, we understand how important it is to protect your home from roof leaks and other damage. Our experienced team is dedicated to providing high-quality repairs you can rely on, whether it’s a minor fix or a more extensive project. With our commitment to top-notch craftsmanship and outstanding customer service, you can trust us to keep your roof in the best condition possible. Our experienced team serves both North and South Carolina homeowners, including Fort Mill, SC, with high-quality repairs and replacements you can rely on.
Don’t wait for a small issue to turn into a bigger problem—contact Great State Roofing today for a free consultation and let us handle your roofing needs with care and expertise!


Very professional. Quality work. I would highly recommend for any roofing needs.